
We recommend you visit the interactive version. The text to the right is provided for printing purposes.
|

|
|
More than just a pretty picture
by Jeff Hester, Arizona State University
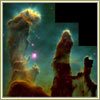
Many people have gazed in awe at the Hubble Space Telescope image (left) taken
of the Eagle Nebula, a spectacular star-forming region about 6,500 light-years
away. Indeed, I'm proud to say—since I "took" the picture with my
colleague Paul Scowen at Arizona State University—that the image is
arguably the most famous Hubble photograph ever taken. But few laypeople
realize just how much effort goes into preparing such images sent down from
our orbiting eye on the universe.
In this feature, I'll walk you through the
various steps it took to assemble this image from the raw data, then end with
just a bit about what the image tells us about the "Pillars of Creation," as
this fascinating star nursery has been dubbed.
But first a little background: The Eagle Nebula image was taken on April 1, 1995, by the Hubble's Wide Field
and Planetary Camera 2. Like a digital camera, the WFPC2 uses charge-coupled
devices (CCDs) rather than film to record images. CCDs have an array of
light-sensitive elements called pixels that turn light falling on them into
electrical signals. As we'll see, all the hard work of preparing the final
image involves knowing how to interpret each of those signals, removing the
"fingerprints" of the camera itself, and turning the signals into measurements
of how bright the light is at specific points in the sky.
The WFPC2's field of view is about 1600 by 1600 pixels, which makes it roughly
equivalent to a 2.5 megapixel digital camera. While the final image is not true
color, it is closer to what your eye would see if you went there than the
picture you would get with color film.
Before we begin fashioning the image, I need to reveal why the final picture
seems to have had a big bite taken out of its upper-right quadrant.
|
|
|
Size matters
The WFPC2 actually has four separate cameras—three Wide Field (WF)
cameras and one Planetary Camera (PC), known as PC1. As this illustration
shows, each camera images one quarter of the scene being photographed.
All except the PC1, that is. It records a magnified view of its portion, which
allows astronomers to see finer detail in that corner of the overall image. The
final picture would look strange this way, so we need to scale the PC1 image down
in size to proportionally match the other three images. (See previous picture for
resized PC1 image.) Now you see why all pictures taken by Hubble's WFPC2 instrument
have a stair-step shape.
Let's back up and start at the beginning. A warning: the raw image beamed down
from Hubble is a far cry from its polished final version.
|
|
|
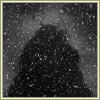
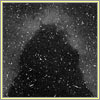
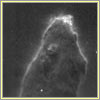
Raw Deal
I told you it would look different! Here's why: First, and most obviously,
we're looking through a blizzard of cosmic radiation and other spurious signals
that we'll soon get rid of. Second, we're only looking at an image from the PC1
camera; we'll get to the images from the three WF cameras in a moment. Third,
we're only looking at one of four colors of light that each of the four cameras
records. (Just as a TV makes a color picture by combining red, green, and blue
images, our final color image will combine images taken through different
filters—more on that later.)
Finally, we're only looking at one of 32 different images that go into
producing the final picture. That's because each of the four cameras takes
two images through each of its four filters. Why the duplicate pictures?
Let me explain.
|
|
|
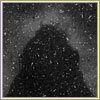
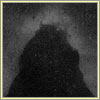
Cosmic graffiti
Each of the WFPC2's four cameras takes two images with each of its four
filters for a good reason. Most of the "snowflakes" you see here are cosmic
rays—atomic nuclei whizzing about space at close to the speed of
light—that struck the CCD at the moment the image was made. Each cosmic
ray leaves a streak across the CCD. Like scratches on a photographic negative,
these streaks interfere with the scene we want to see, namely, the Eagle
Nebula. Fortunately, cosmic rays arrive randomly, so the marks they leave
differ from image to image. Click between the two "Cosmic Graffiti" images, which
were taken within moments of each other. Notice how the cosmic-ray marks differ
in each.
Now we need to clear away all that annoying cosmic "snow."
|
|
|
Goodbye to all that
This is the final cleaned-up image. How did we banish the blizzard? First, we
flagged sharp features appearing in one image but not the other as cosmic-ray
garbage and discarded them. Then we combined the two "snow"-free images to
improve the signal-to-noise ratio. We also corrected for a number of
instrumental effects with names like "dark current," "flat fields," and "charge
transfer inefficiencies." No need to bore you with details of those effects,
even though as a member of the team that built the camera I spent a couple of
years figuring out how to characterize and remove them!
Despite all these efforts, some cosmic rays and other defects remain that we
need to jettison.
|
|
|
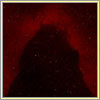
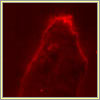
Unsavory characters
One way to find the remaining cosmic rays and other defects is to compare the
four images taken with the four different filters. Another way is to compare
the pictures with the image profile of a point source such as a star. If we see
a sharp bit of light that doesn't have the right profile to be a star, it's
probably a cosmic ray residual or other defect that we need to flag and remove.
This image shows the remaining undesirable bits flagged in white against the
desired image, shown for the moment in red to ease visibility.
Now let's delete the remaining "flurries" and see what we've got.
|
|
|
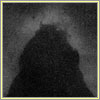
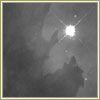
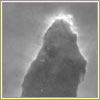
Spanking clean
This is the final, fully cleaned-up version of the PC1 image—or at least
one of the PC1 images. Remember that a picture was taken with the PC1 through
each of four filters. Each filter records light emanating from the target
object—in our case the Eagle Nebula—in very specific parts of the
visible-light spectrum.
Different types of atoms, it turns out, emit light at very specific
wavelengths—that is, very specific colors. This allows astronomers like me to take images that
only show the light coming from specific types of atom. For the Eagle Nebula
image, the WFPC2 used filters that took images in the light of three kinds of
atoms: hydrogen atoms, sulfur atoms with one electron removed (sulfur ions),
and oxygen atoms with two electrons removed (doubly ionized oxygen). A fourth
filter sees only starlight, which lights up the dust that is mixed in with the
nebula's gas.
The PC1 image that we've been manipulating was taken with the oxygen filter.
The first step in getting the PC1 image together with its Wide Field mates is
to obtain cleaned-up versions of the three WF images also taken with the oxygen
filter.
|
|
|
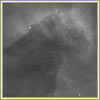
Number two
This is the cleaned-up version of the oxygen-filter image taken by the WF2
camera, that is, the camera that took the image of the upper left quadrant of
the final image. Note that we have reoriented this image and the next two from
the way the WFPC2 actually took them, in order to make them "upright."
|
|
|
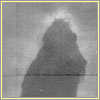
Number three
This is the cleaned-up version of the oxygen-filter image taken by the WF3
camera, that is, the camera that took the image of the lower left quadrant of
the final image.
|

|
|
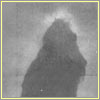
Number four
This is the cleaned-up version of the oxygen-filter image taken by the WF4
camera, that is, the camera that took the image of the lower right quadrant of
the final image.
Let's now combine the four images into a single portrait of the Eagle Nebula.
|
|
|
Come together
Each of the four images has geometrical distortions similar to those you see
when you look through a magnifying glass. To combine the images of the four
different cameras into a single, accurate picture of the nebula, we need to map
and remove those distortions. Once we've done so, the four images fit together
nicely, giving us this single mosaic image of the Pillars of Creation, showing
light coming through the oxygen filter.
Now the picture is beginning to resemble its final self. But who wants those
ugly seams? Let's erase them.
|
|
|
Wrinkle free
Okay, we've gotten rid of those unsightly lines. But remember, this image only
shows light originating from doubly ionized oxygen atoms.
Let's have a look at similarly processed images taken in the light of hydrogen
atoms and sulfur ions. As you go through the images, notice the subtle
differences between them. Comparing the light coming from different types of
atoms is what allows us to turn what otherwise might be just a pretty picture
into detailed knowledge of the physical conditions from region to region within
the nebula. More on that in a minute.
|
|
|
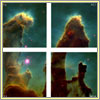
A striking couple
Here are images of the Eagle Nebula taken in the light given off by its
hydrogen atoms (1) and its sulfur ions (2). Click between the two pictures to compare how
the nebula looks in the two images.
If you're curious as to where these atoms' so-called emission lines fall on the
visible-light spectrum, see the graph below. The
wavelengths of the light picked up by the WFPC2's hydrogen and sulfur filters
are 6563 and 6725 angstroms, respectively. (One angstrom is equal to one
ten-billionth of a meter.) The corresponding wavelength for light coming
through the oxygen filter is 5007 angstroms.

We now have three images, each showing us light from a different type of atom.
Now, the best way to see the differences among these three images is to make
each of the three a different color, then use our color vision to tell us how
the nebula's properties are changing from place to place.
|
|
|
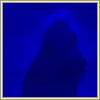
Blue sky
Here, we have assigned the color blue to the oxygen-filter image.
|
|
|
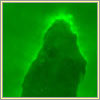
Heavenly hues
We've cast the hydrogen-filter image in green and the sulfur-filter image in
red. Compare the three color images to see how the colors enhance the subtle
structural variations that the two pictures reveal in the nebula.
Now for the grand finale—combining all three processed color images.
|
|
|
The Eagle Nebula
Here is the final, fully processed photograph that NASA released in 1995. Now,
what does the image tell us about what we're seeing? Basically we're looking at
dense clouds of molecular hydrogen gas and dust that form just one part of the
Eagle Nebula. This is a large area: From top to bottom, the pillar at left
extends about four light-years, or the distance light travels in four years
going at roughly 186,000 miles per second!
Parts of the clouds, particularly the finger-like projections you can see at
various points along the pillars, are dense enough to collapse under their own
weight, forming young stars. These embryonic stars continue growing as long as
they can draw mass from the surrounding clouds. But ultraviolet light from
massive newborn stars (unseen off the top edge of the picture) is eating away
at the pillars, essentially evaporating the gas in these clouds. Such
"photoevaporation" gives shape to the pillars and illuminates the fog of gas
burning off their edges.
If you could go back 4.5 billion years and watch as our sun and solar system
formed, you would probably see a region very much like what you see in the
Eagle Nebula today. There's a lot more science having to do with understanding
the detailed physics of the gas and what images like this tell us about how
stars form. But now you have at least a rough idea of both what we're learning
from this single snapshot from the Hubble Space Telescope and what it takes to
produce all those gorgeous images taken in orbit. For more on how the Hubble
works, see the official Hubble Web site.
|
|
|