 |
Capturing it on Film
 How do the experts capture avalanches on film, and live to try again?
Below are the basic steps that cinematographer Steve Kroschel uses. (Please
don't try this yourself.)
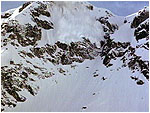 |
Scout the location
Kroschel consults with avalanche safety experts Doug Fessler and Jill Fredston
to find a promising avalanche zone—an area that has been known to slide in
the past. He also needs a location where the light will enable him to capture a
dramatic shot, and a sunny day. For this shot Kroschel has chosen an isolated
stretch of the Chugach mountain range in Alaska.
|
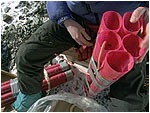 |
Prepare the trigger
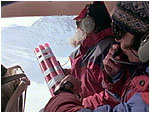
When the weather looks promising, Doug, Jill and Steve fly to the site in a
helicopter. Now begins a carefully choreographed sequence of events which will
allow the team to predict exactly when the avalanche will slide, when the
camera will turn on to capture the slide on film, and where they will be to
avoid being captured themselves. First Doug and Jill prepare the explosives
which will set off the avalanche. The bombs have fuses on them so that once
they are lit, the team has just 90 seconds before the avalanche slides.
|
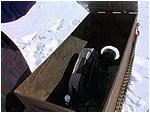 |
Put camera in crash box
The camera is housed inside a 60-pound crash box with foam padding stuffed
around it to prevent the camera from breaking apart while the avalanche flows
around it. The heavy crash box keeps the camera from being flattened once the
snow comes to a stop. Inside the crash box is an avalanche transceiver, which
enables the team to locate the box even if it winds up 12 feet under.
|
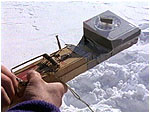 |
Set rat trap and egg timer
Because film is expensive, Steve has come up with a low-tech but effective way
to turn the camera on and off at the right time. An egg timer is attached,
using string and duct tape, to a rat trap, which in turn is attached with
string to a toggle switch on the camera. When the egg timer hits 15 minutes,
the rat strap snaps, the toggle switch flips, the camera turns on, and film
starts rolling. To stop the film rolling at the right moment, Steve runs the
cables for the camera's battery around the outside of the crash box; as soon as
the avalanche buries the box, the cables are disconnected, and the camera
automatically turns off.
|
 |
Commence bombing mission
Steve relocates to another ridge with a second camera, in order to capture
another angle of the avalanche on film. Meanwhile, Doug and Jill have just a
few minutes to take to the skies and commence their carefully timed bombing
mission. There's only one chance to get this shot. Jill wears two watches, one
set to the egg timer, and another set to the explosives fuses. The fuses are
lit so that the bombs will explode about 30 seconds after Steve's egg timer has
activated the rat trap and started film rolling through the camera.
|
 |
Locate crash box
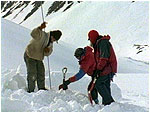
The avalanche takes less than a minute to slide. Jill and Doug then
take a second pass in the helicopter over the avalanche path, and set off
additional explosives if they feel there is any chance there might still be
some snow ready to slide. The team then returns to the avalanche zone, and uses
the transceiver to locate the crash box, which is usually buried under enormous
piles of hard, compacted snow. Once they know the general location of the
crash box, they use long skinny poles called avalanche probes to poke through
the snow and find the box.
|
|
Process Film
The film is sent to a lab to be processed. Click the first box below to see
this avalanche. Click the other boxes to see more avalanches.
|
You'll need the free
RealPlayer plugin
to be able to view the avalanche clips below. If you already have the software,
choose an appropriate connection speed to view
a clip.
 |
Helicopter Over Avalanche
|
 |
House Destroyed by Avalanche
|
 |
Head-on Avalanche
|
 |
Avalanche on Peak
|
 |
Massive Avalanche
|
 |
Avalanche Crashes Down Slope
|
Capturing |
Making |
Elements |
Snow Sense |
Resources
Mail |
Teacher's Guide |
Transcript |
Avalanche Home
|